Attaching metal roofing requires precision and attention to detail to ensure a secure and weatherproof finish. Typically, metal roof panels are designed to interlock or overlap, allowing for expansion and contraction due to temperature changes. Screws or fasteners are used to attach the panels to the roof structure, and these must be placed at specific intervals and in precise locations to maintain the integrity of the roof. The type of fastener and method depend on the profile and design of the metal roofing being installed.

Safety is paramount when working on a roofing project since it involves working at heights. Using proper safety equipment and following best practices to prevent falls and accidents is essential. Pre-drilling holes in the panels before securing them ensures that the screws can grip the metal effectively. This reduces the risk of leakage and prevents damage to the metal panels, which can compromise the roof’s durability.
Sealing is also critical to prevent moisture from penetrating the roofing system. Installers must use high-quality sealants and ensure overlapping panels create an effective water barrier. Correct installation of metal roofing can result in a long-lasting, durable, and aesthetically pleasing roof that can protect a structure effectively for many years.
Preparation and Safety
Before beginning a metal roof installation, it is crucial to understand the basics of metal roofing, select the appropriate materials, and adhere to stringent safety measures to ensure a successful and injury-free installation process.
Understanding the Basics
Metal roofing installation starts with precise measurements and an understanding of the roofing structure. One must calculate the roof’s length, width, and rise to ensure proper material quantities. Installation of the first piece is pivotal; it sets the direction and alignment for subsequent panels. Typically, one would start at the bottom edge of the roof, squaring the first panel before securing it in place.
Selecting the Right Materials
To attach metal roofing effectively, one needs the correct types of screws, sealants, and underlayment. Here’s a brief list:
- Screws: Use screws that are long enough to penetrate the decking.
- Sealant: Apply a high-quality sealant to prevent leaks.
- Underlayment: A synthetic underlayment ensures maximum water resistance.
One must install the underlayment over the roof deck before attaching the metal panels. This acts as an additional barrier against water penetration.
Safety Measures
When handling metal roofing, the individual must wear appropriate safety gear, such as gloves and safety goggles, to prevent cuts and eye injuries. Additionally, it’s essential to:
- Check for overhead hazards: Ensure no electrical wires or branches are present.
- Secure the ladder at the base and the roof contact point to prevent slips.
Inspect the tools needed for the job, confirming that all are in good working order. This will not only contribute to the efficiency of the job but also to the safety of the individual installing the roof.
Installation Process

Precision in laying the foundation, securely attaching roof panels, and understanding the nuances of different structures are paramount for a successful and enduring outcome when installing metal roofing.
Laying the Foundation
To prepare for metal roofing installation, one must ensure the roof deck is solid and debris-free. The installation begins by laying a water-resistant barrier over the deck, which protects against moisture intrusion. This foundational layer often consists of synthetic underlayment or rosin paper.
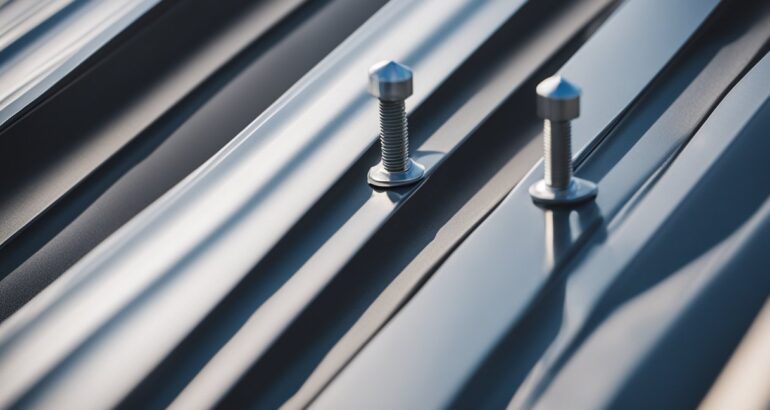
Securing the Panels
Metal panels are generally secured to the roof with specialized fasteners or clips. For through-fastened corrugated metal panels, screws with rubber washers are driven through the metal and into the roof decking at predefined intervals to create a water-tight seal. For standing seam metal roofs, a clip system is used where the panels are secured to the clips without puncturing the metal, allowing for thermal movement.
On a shed: Metal panels are attached starting from the roof’s lowest edge to the top, overlapping each panel over the previous one by a standard measure (typically 1 to 2 inches) to ensure proper water runoff. The panels are then secured using screws.
On the house: The process is similar but typically involves larger panels and more complex cuts to accommodate features like chimneys, valleys, and hips. Precision and care are critical to prevent leaks and ensure the roof’s longevity.
Attaching on Different Structures
The approach for attaching metal roofing changes with the structure’s specifics. The installation on a shed might be more straightforward, involving single, smaller-size panels and a simpler roofline. In contrast, a house generally demands careful measurement, cutting, and fitting of panels to match its more intricate shape. Additional elements like gable ends, roof valleys, and dormers require installing specialized flashing and trims before the metal roofing.
Common Mistakes and Troubleshooting

When attaching metal roofing, precision is crucial. Acknowledging common installation errors and troubleshooting can save time and resources, ensuring a durable and secure metal roof.
Avoiding Installation Errors
Metal roof installation demands meticulous attention to detail. A significant mistake often made is incorrectly measuring the area, leading to delays or extra costs. To avert this, one must always double-check measurements before cutting panels.
Mistakes with fasteners can compromise the roof’s integrity. Fasteners should be installed perpendicularly to the roofing surface and adequately penetrate the decking or framing. Overtightening can strip the screw hole and damage the metal, while under-tightening can leave spaces for water ingress.
An installation diagram can provide a visual guide for proper fastener placement and panel alignment, vital for efficient water drainage and structural stability. It’s important to use a diagram tailored to the installed roofing product.
- Incorrect Fastener Placement:
- Use predefined spacing as illustrated in the metal roof installation diagram.
- Avoid placing screws at the tip of the rib where water collects.
- Panel Alignment:
- Ensure each panel is squared to the eaves and overlaps correctly with the next panel.
- Follow the diagram to maintain uniformity across the roof’s surface.
Troubleshooting Common Issues
When problems arise, one must be skilled at identifying and rectifying them swiftly to prevent further complications. Leakage, for instance, might indicate that sealants at panel interlocks or flashings were improperly applied or have deteriorated.
Inspect flashing carefully. It must be securely attached and sealed to prevent water from entering. If a metal roof leaks, one should check if the flashing has been properly integrated with the surrounding materials and structures as per the installation instructions.
oil canning, described as waviness in the flat areas of metal roofing panels, is a cosmetic issue affecting the appearance of a metal roof. It’s often a result of uneven substrate, over-tightened fasteners, or thermal expansion.
- Leaking:
- Identify the source by checking for improperly attached flashings, sealant failures, and faulty fasteners.
- Reapply sealant or replace flashings as required.
- Oil Canning:
- While often not a sign of failure, reducing aesthetic concerns starts with ensuring proper material handling and storage, using thicker materials, or selecting a striated or textured panel profile.
Experienced installers troubleshoot issues better and prevent recurring problems, underscoring the value of hiring skilled professionals for metal roof installations.
Freddy & Son, Your Trusted Metal Roofers in Virginia
Freddy and Son stands as the go-to commercial metal roofing contractor in Virginia, offering unparalleled expertise and a commitment to excellence. With a team of highly skilled metal roof installers trained in the latest techniques, they deliver reliable, durable, and cost-effective solutions for businesses across Virginia, Maryland, Washington D.C., and Pennsylvania.
From new installations to replacements, scheduled maintenance, and emergency repairs, Freddy and Son ensure the longevity and protection of commercial buildings.
With a focus on environmental friendliness, energy efficiency, and long-term investment, Freddy and Son emerge as a trusted partner, offering peace of mind through Labor and Manufacturer Warranties. Choose Freddy and Son for expert roofing solutions that elevate your property and ensure its safety and operational efficiency.

